VSCodeでCopilot Chatの独自のAgentを開発する
VSCodeのCopilotには @workspace のようなAgentと呼ばれる機能があり、独自のAgentsも開発することができるみたいです。
こちらの記事を読んで知りました。
https://laiso.hatenablog.com/entry/2023/12/02/150356
ここでは練習としてTypeScriptの関数を作成してくれる @ts-function を作成しました。
サンプルのリポジトリはこちら。
https://github.com/RyukyuInteractive/vscode-extension-chat
CloneしてVSCodeの再生ボタンで実行すればとりあえず動きます。
作り方
ゼロから作りたい方向けの案内です。VSCodeの拡張はYoを使用して作成できます。
$ yo code

     _-----_     ╭──────────────────────────╮
    |       |    │   Welcome to the Visual  │
    |--(o)--|    │   Studio Code Extension  │
   `---------´   │        generator!        │
    ( _´U`_ )    ╰──────────────────────────╯
    /___A___\   /
     |  ~  |
   __'.___.'__
 ´   `  |° ´ Y `

? What type of extension do you want to create? New Extension (TypeScript)
? What's the name of your extension? vscode-extension-chat
? What's the identifier of your extension? vscode-extension-chat
? What's the description of your extension?
? Initialize a git repository? Yes
? Bundle the source code with webpack? Yes
? Which package manager to use? npm
このサンプルを参考にしてファイルを追加します。
https://github.com/microsoft/vscode-extension-samples/tree/main/chat-agent-sample
- extension.ts
- src/vscode.proposed.chat.d.ts
- src/vscode.proposed.chatAgents2.d.ts
- src/vscode.proposed.chatRequestAccess.d.ts
- src/vscode.proposed.chatVariables.d.ts
この中の extension.ts をこのように書き換えました。
定義していただく関数の条件を箇条書きで渡しています。
import * as vscode from "vscode"

export function activate(context: vscode.ExtensionContext) {
  const handler: vscode.ChatAgentHandler = async (
    request,
    context,
    progress,
    token,
  ): Promise<vscode.ChatAgentResult2> => {
    const access = await vscode.chat.requestChatAccess("copilot")

    const messages = [
      {
        role: vscode.ChatMessageRole.System,
        content: `以下のルールに従ってTypeScriptで書かれた関数のコードと説明を応答してください。
        - 最新の文法を使用する
        - 可能な限り再代入を避ける
        - 必要に応じてガード節を使用する
        - Any型の使用はジェネリクスを用いて避ける
        - Any型の値を返却しない
        - undefinedの代わりにnullを使用する
        - 変数名は省略しない
        - 引数が複数ある場合はオブジェクトにする
        - 引数がオブジェクトの場合は変数名をpropsに型名はPropsにする
        - 分割代入引数を使用しない
        関数の形式:
        ${encloseWithTripleBackticks(sampleCode)}`,
      },
      {
        role: vscode.ChatMessageRole.User,
        content: `${request.prompt}(日本語で応答)`,
      },
    ]
    const chatRequest = access.makeRequest(messages, {}, token)
    for await (const fragment of chatRequest.response) {
      progress.report({ content: fragment })
    }
    return {}
  }

  const agent = vscode.chat.createChatAgent("ts-function", handler)
  agent.iconPath = vscode.Uri.joinPath(context.extensionUri, "icon.png")
  agent.description = vscode.l10n.t("今日は何をお手伝いしましょうか?")
  agent.fullName = vscode.l10n.t("ts-function")
}

export function deactivate() {}
更に package.json の以下の箇所を書き換えました。
  "extensionDependencies": [
    "github.copilot-chat"
  ],
  "activationEvents": [
    "onStartupFinished"
  ],
  "enabledApiProposals": [
    "chatAgents2",
    "chatRequestAccess"
  ],
  "main": "./out/extension.js",
ここではパッケージ名をこのようにしていますが、好みの名前に変更します。この名前は他のファイルの設定で覚えておきます。
"name": "vscode-extension-chat",
webpackの設定では出力先のディレクトリを out に変更しました。
Microsoftのリポジトリのサンプルコードがそのようになっていたので合わせます。
path: path.resolve(__dirname, "out"),
launch.jsonの設定を以下のように変更します。
Microsoftのリポジトリのサンプルコードには無いですが手元ではこの enable-proposed が無いとエラーになります。
この undefined_publisher の部分は package.json の publisher で名前を指定していない為です。
{
  "version": "0.2.0",
  "configurations": [
    {
      "name": "Run Extension",
      "type": "extensionHost",
      "request": "launch",
      "args": [
        "--extensionDevelopmentPath=${workspaceFolder}",
        "--enable-proposed-api=undefined_publisher.vscode-extension-chat"
      ],
      "outFiles": ["${workspaceFolder}/out/**/*.js"],
      "preLaunchTask": "${defaultBuildTask}"
    }
  ]
}
最後にVSCodeの再生ボタンで拡張を実行してチャットの動作確認をします。
応答を変更する
サンプルコードのこの部分を書き換えるとチャットの応答を変更できます。
const messages = [
  {
    role: vscode.ChatMessageRole.System,
    content: `以下のルールに従ってTypeScriptで書かれた関数のコードと説明を応答してください。
    - 最新の文法を使用する
    - 可能な限り再代入を避ける`,
  },
  {
    role: vscode.ChatMessageRole.User,
    content: `${request.prompt}(日本語で応答)`,
  },
]
このChatMessageRoleは3種類あります。
- System - Botの設定
- User - ユーザの発言
- Assistant - Botの発言
詳しくはここを参考にしてください。
https://platform.openai.com/docs/guides/text-generation/chat-completions-api
ここではTypeScriptの関数を応答するような設定にしていますが、例えばTailwind CSSのクラス名を生成して応答するような指示も出来ます。
{
  role: vscode.ChatMessageRole.System,
  content: `以下のルールに従ってTypeScriptで書かれた関数のコードと説明を応答してください。
  - 最新の文法を使用する
  - 可能な限り再代入を避ける`,
}
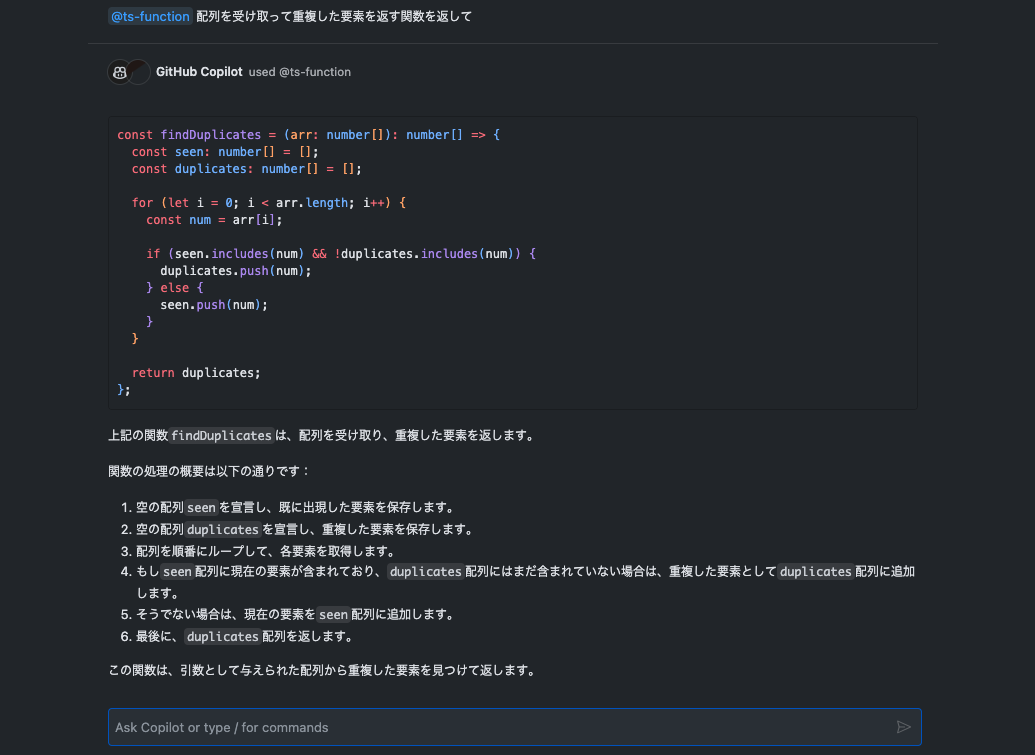
ユーザの発言は request.prompt にありますが。好きなように編集できます。後に (日本語で応答) のような指示を追加するとSystemより効きやすいです。
{
  role: vscode.ChatMessageRole.User,
  content: `${request.prompt}(日本語で応答)`,
}
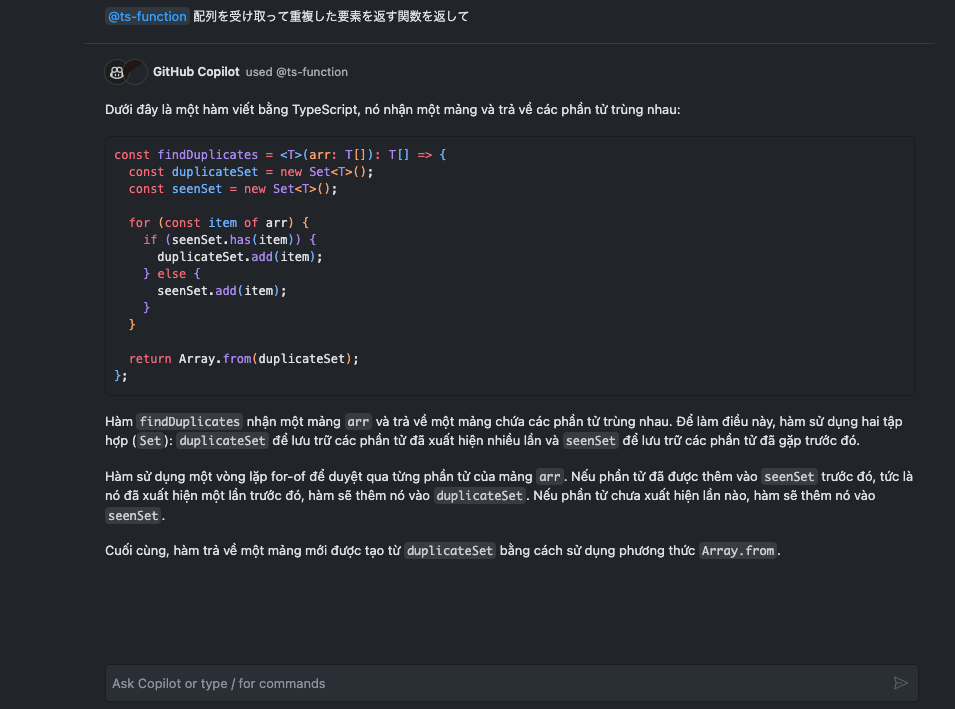
ここでベトナム語を指定すればベトナム語になります。このような指示はSystemに書くと無視されることがあります。
{
  role: vscode.ChatMessageRole.User,
  content: `${request.prompt}(ベトナム語で応答)`,
}
日本語で指示してもベトナム語が返ってきます。
設定を変更する
このように設定している場合はチャットで @ts-function と書いて呼び出します。好きな名前に変更してください。
const agent = vscode.chat.createChatAgent("ts-function", handler)
agent.iconPath = vscode.Uri.joinPath(context.extensionUri, "icon.png")
agent.description = vscode.l10n.t("TypeScriptの関数を定義します")
agent.fullName = vscode.l10n.t("ts-function")
他のAPIと組み合わせる
サンプルではVSCodeの vscode.chat というAPIを使用していますが他のAPIと組み合わせて使用します。このままではただのチャットですね。
const access = await vscode.chat.requestChatAccess("copilot")
VSCodeのAPIはこちらで確認できます。
https://code.visualstudio.com/api/references/vscode-api#workspace